In this tutorial, we will show you how to add Google Auto Ads on AMP Pages in just a few clicks.
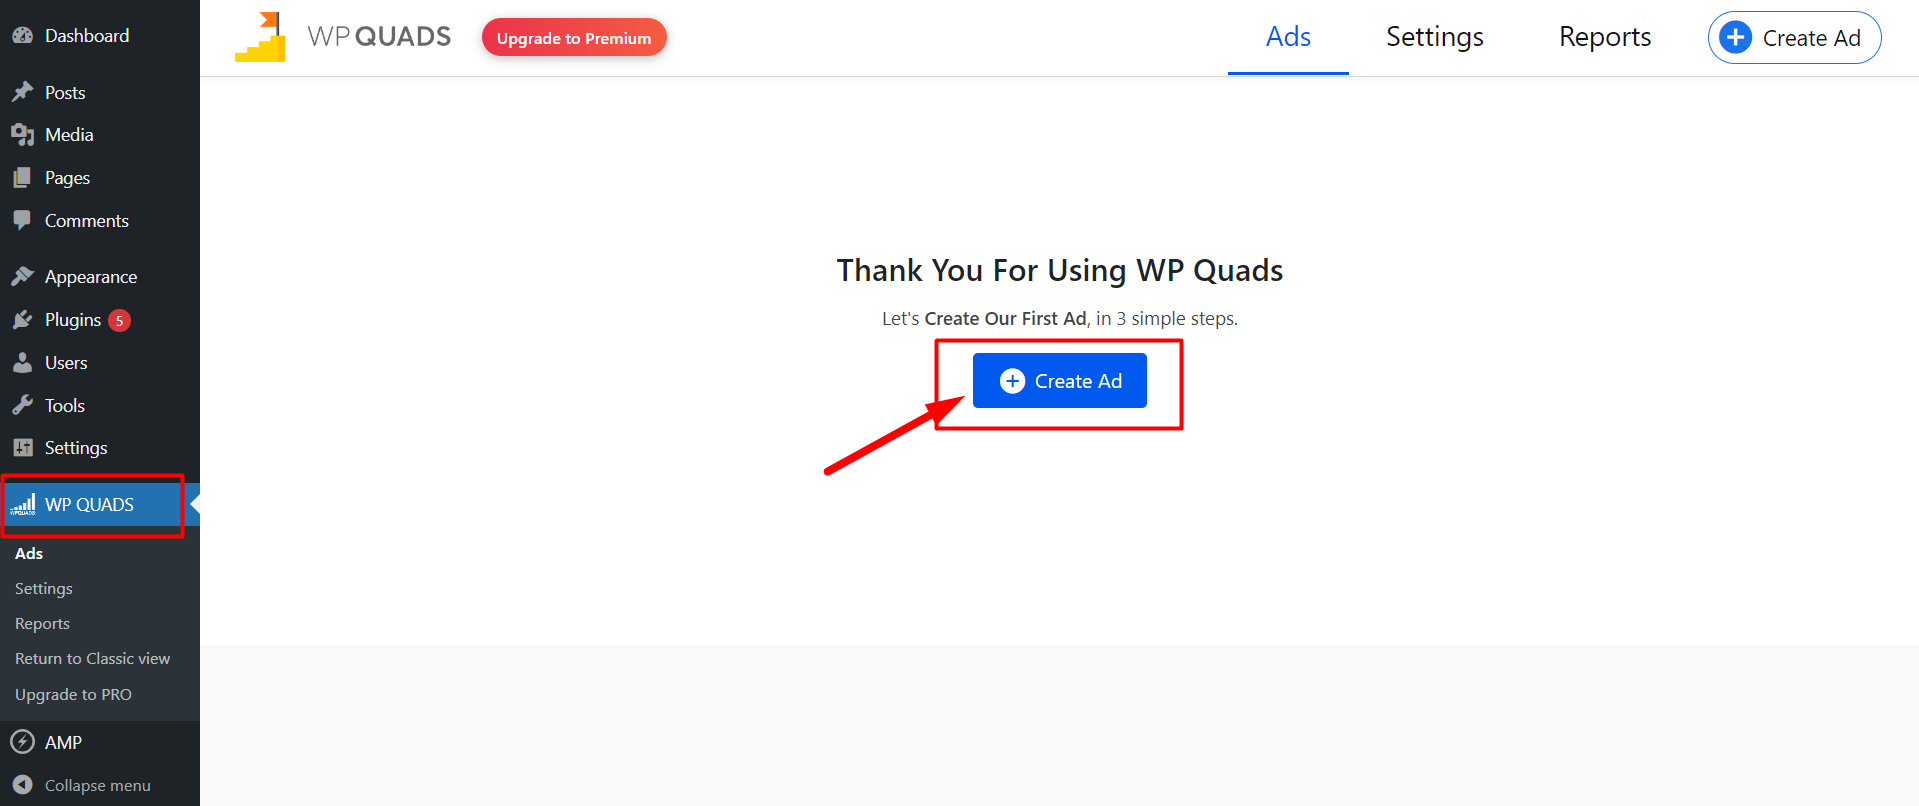
Step 1: Once you install our WP QUADS plugin then go to WordPress Dashboard, navigate to Dashboard ->WP QUADS and click on the Create Ad button.
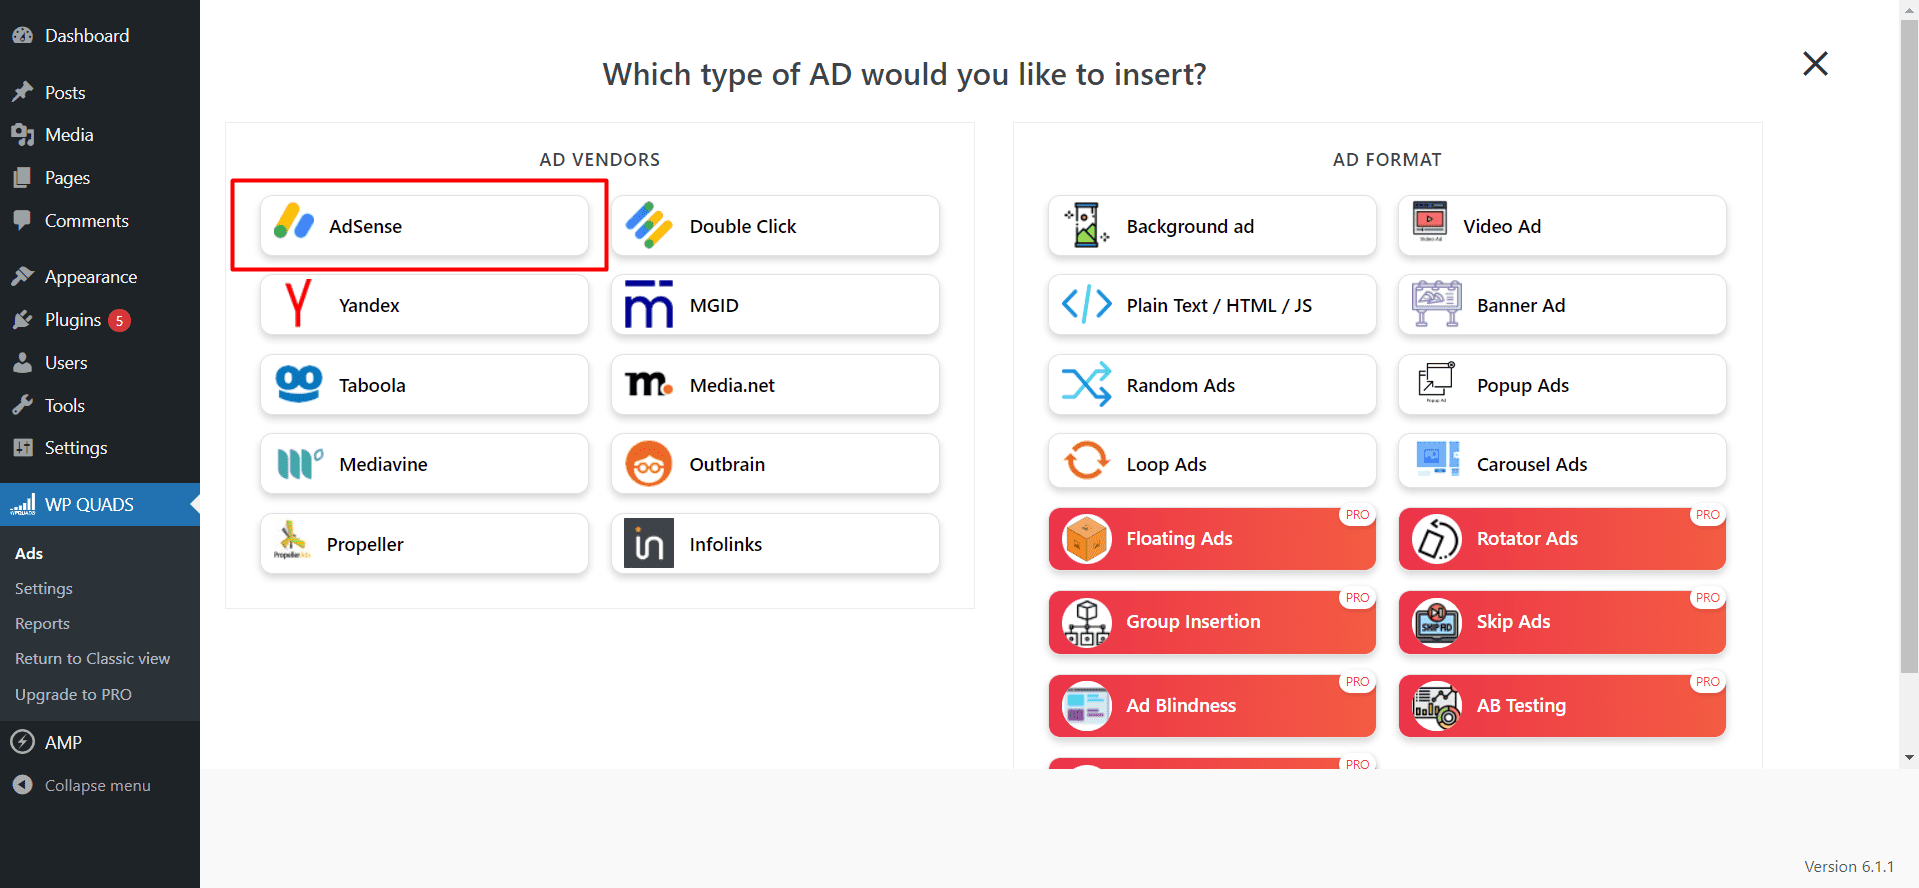
Step 2: once you clicked on “Create Ad”, you will get to choose the Ad type, here you have to choose “Google Adsense”
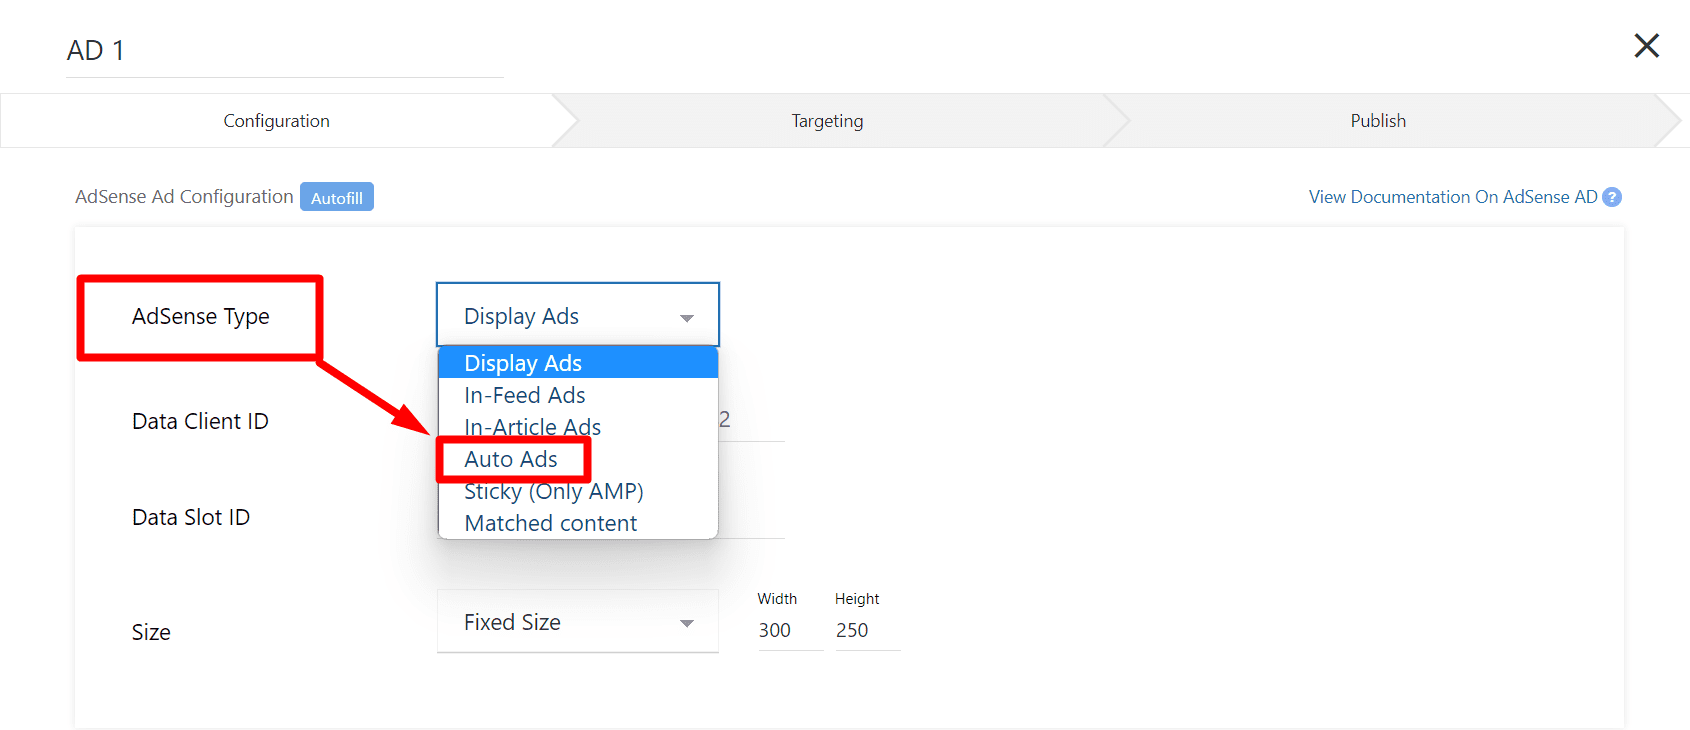
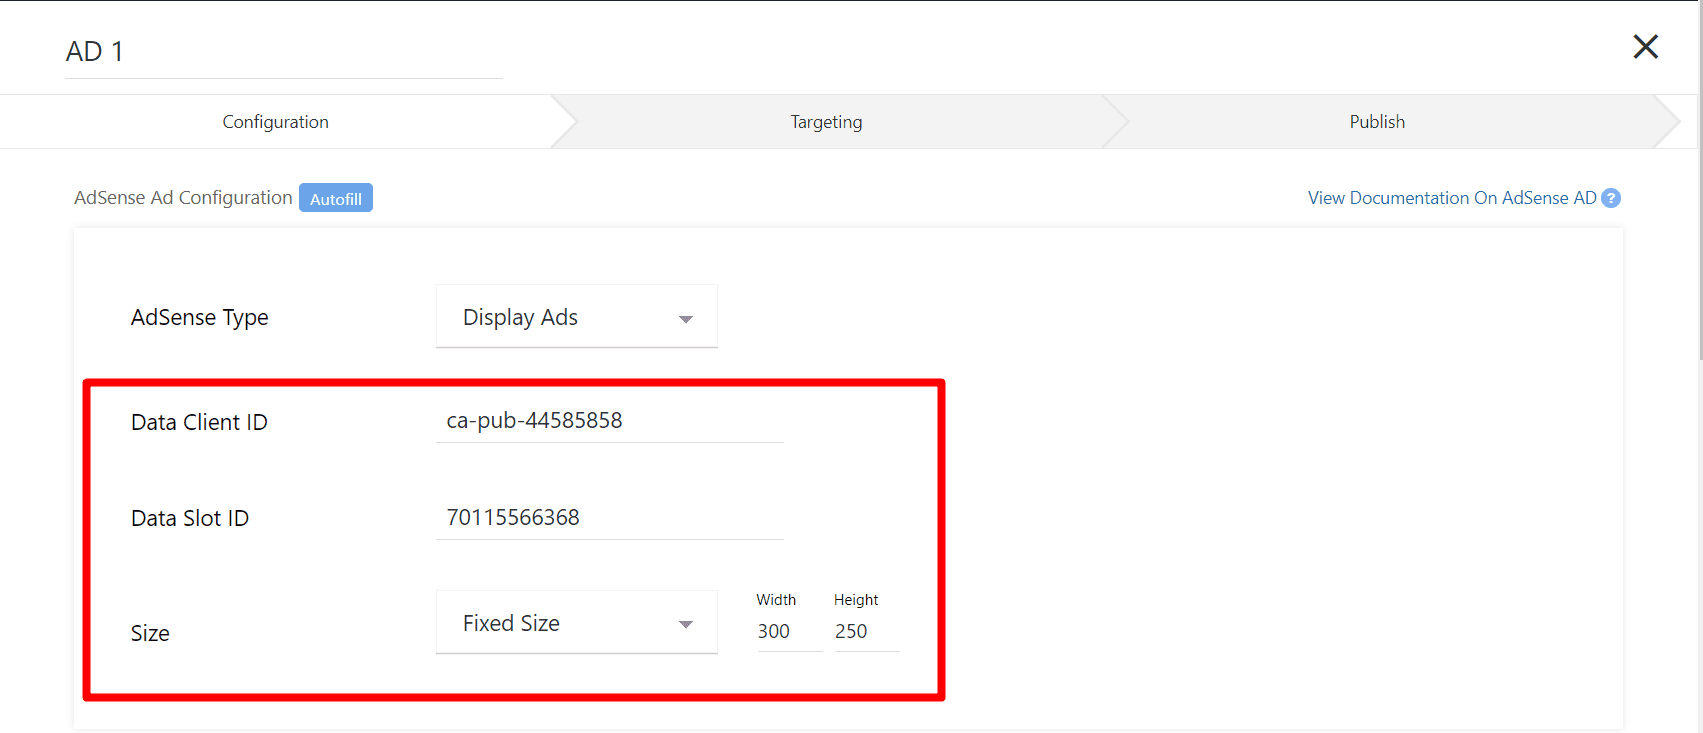
Step 3: After selecting Google Adsense you can configure the Google Ad type in which you have to select “Auto Ads” from the dropdown and input your Data Clint ID and Data Slot ID and configure the Size accordingly.
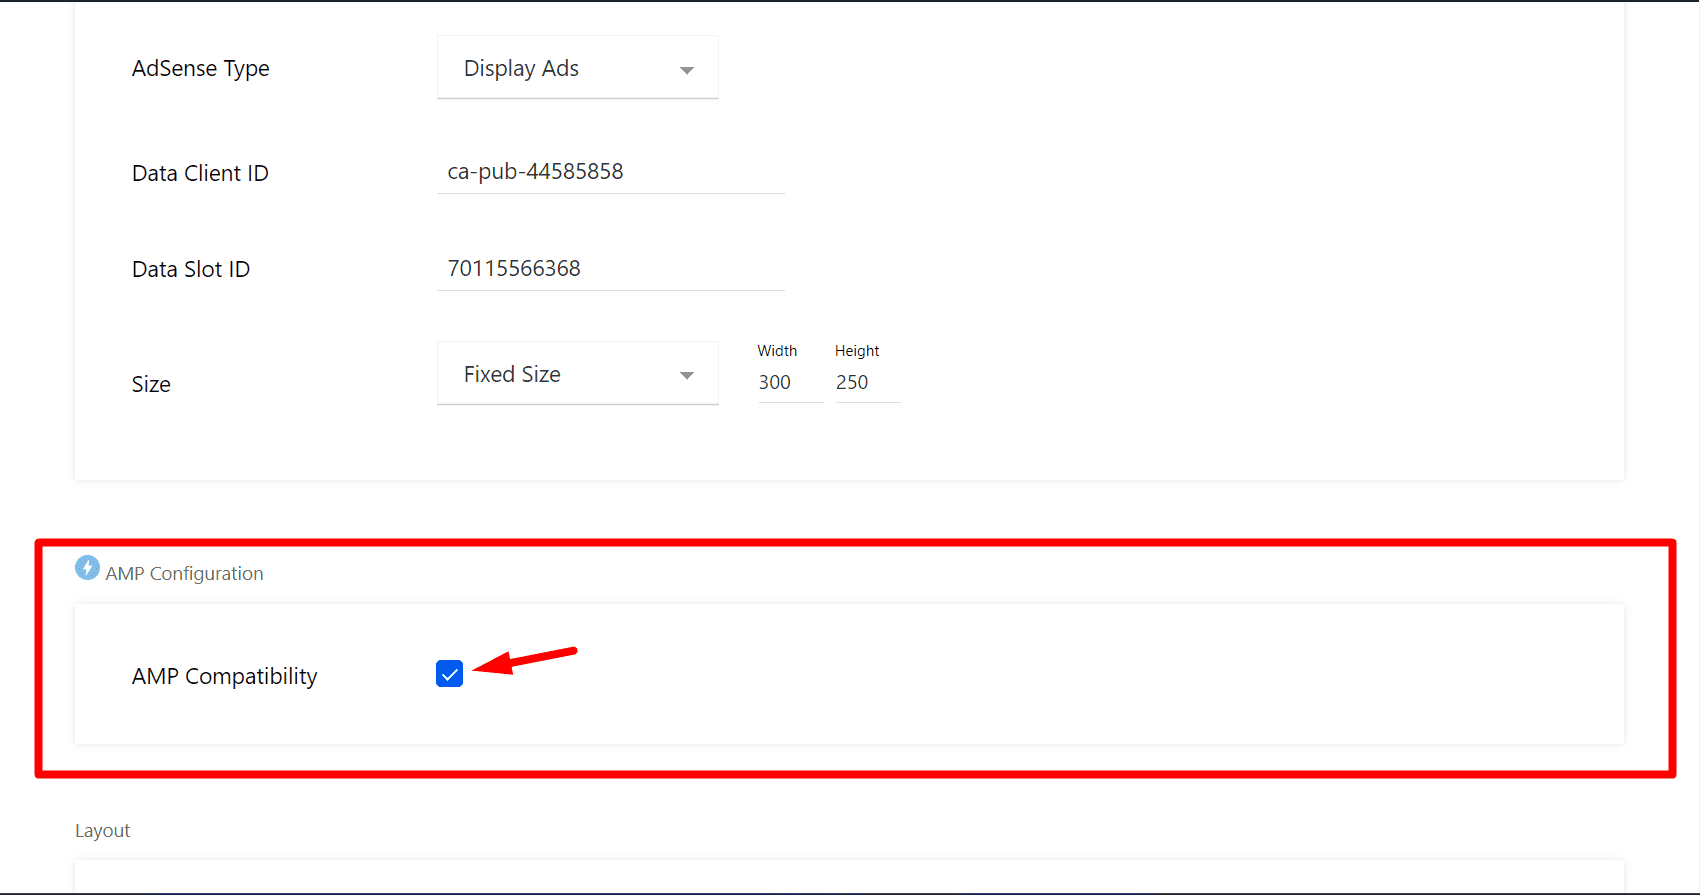
Step 4: After configuring the Auto Ads, you will get an option to enable the Auto Ads on the AMP pages called “AMP Configuration”, you have to enable the check box as shown in the picture below
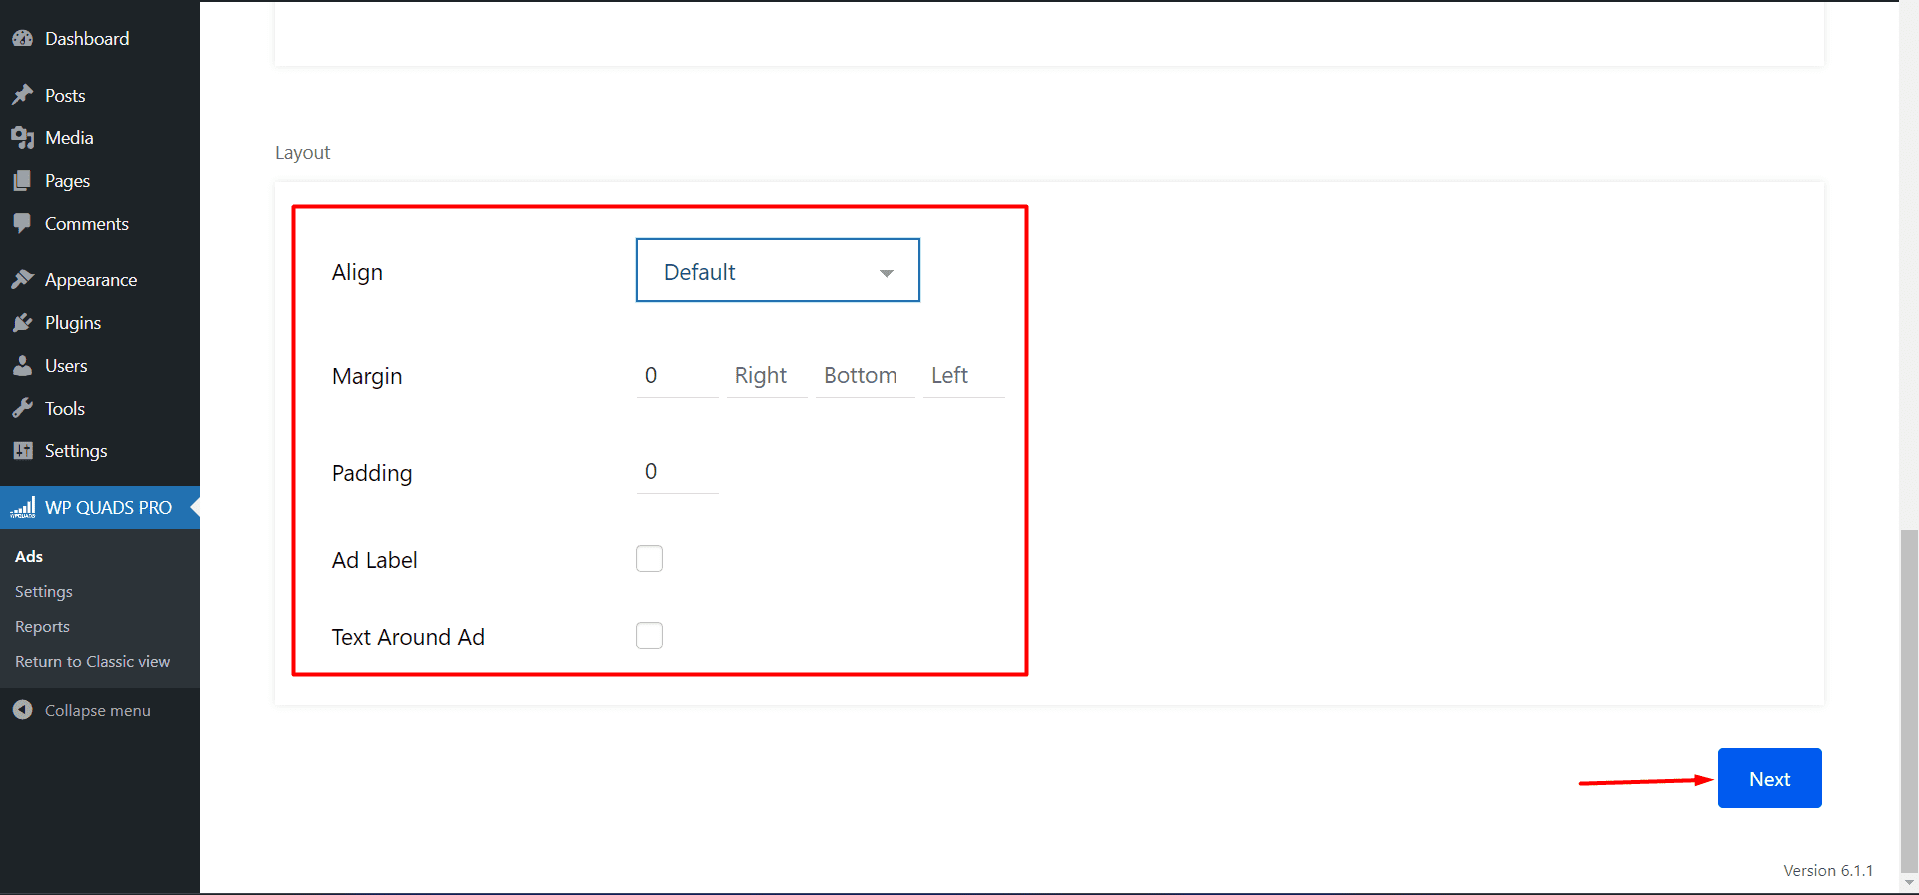
Step 5: once you have configured the AD Appearance, under that you can configure the Layout of your AD i.e Alignment, Margin, Padding, Ad Label, and Text Around the Ad accordingly and click on the Next
Step 6: After clicking on the Next button you will go to the next page where you can configure the Visibility of the Ads.
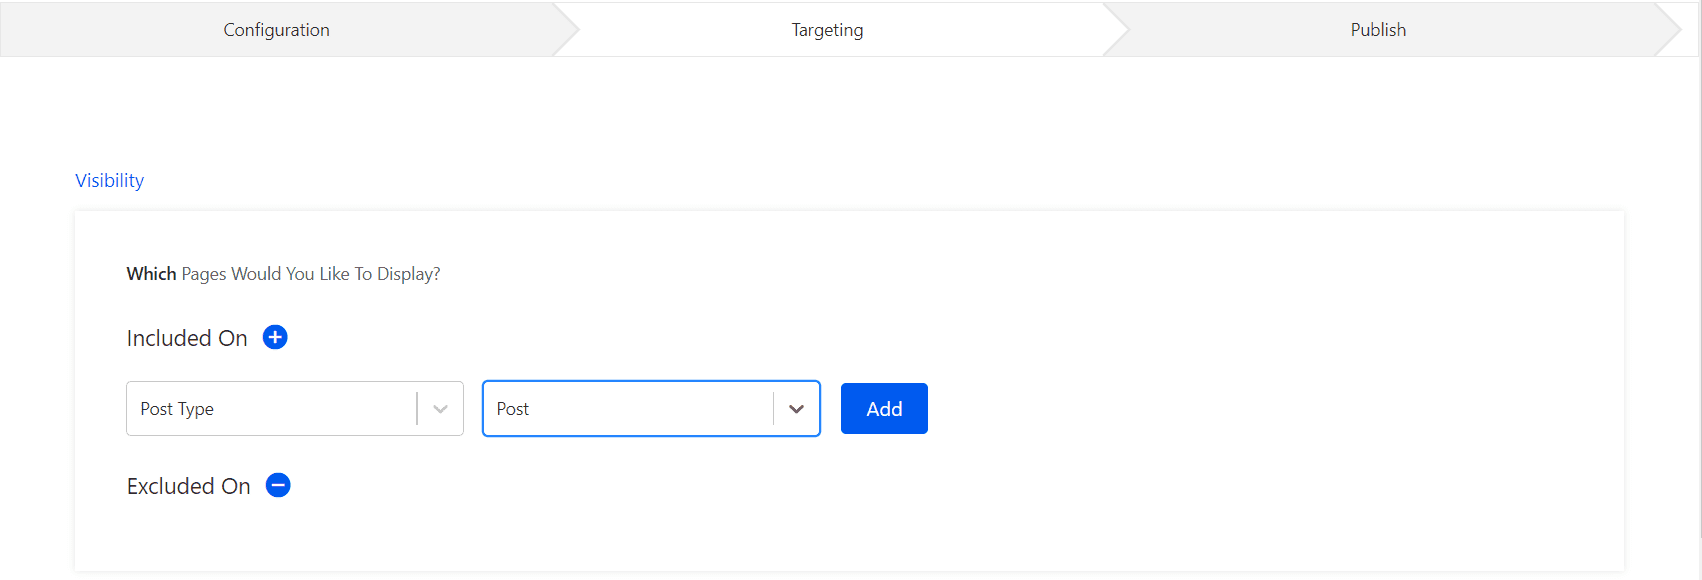
For example:
Include on “Post type -> to-> Post”
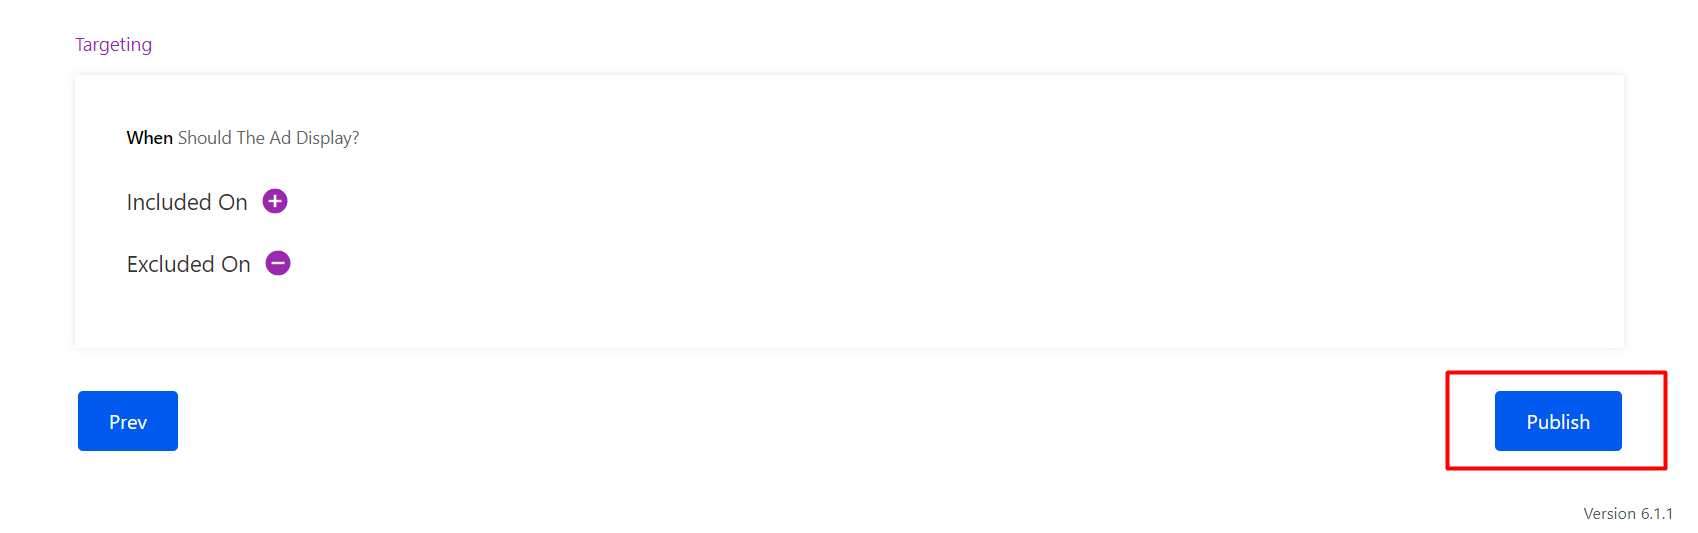
Step 7: Now, once you have configured the Visibility of your AD, you can configure the Targeting of your AD according to your audience.
Step 8: Now click on Publish and that’s it, now the Auto Ads will start to appear on the AMP version of your website.
That’s it for this tutorial!
We hope it helped you. If you have any feedback or questions or do you want us to create compatibility for any other Ad company which isn’t listed in our plugin then you can request us we will surely implement it as soon as possible.
Just contact us here and we are always available for you.