The following are the steps to add Custom Ad Position in WP QUADS
Sample function for creating custom ad positions in your template files and option setting in WPQUADS admin settings.
Use the code below in your “functions.php” file to register custom ad positions:
 <?php if (function_exists('quads_register_ad')){
            quads_register_ad( array('location' => 'header', 'description' => 'Header position') );
            quads_register_ad( array('location' => 'footer', 'description' => 'Footer position') );
            quads_register_ad( array('location' => 'custom', 'description' => 'Custom position') );
            }
       ?>
Use this in your template files wherever you want to show a custom WPQUADS ad position on your site
  <?php if (function_exists('quads_ad'))
            echo quads_ad( array('location' => 'header') );
       ?>
Follow these easy steps to add Custom Ad Position in WP QUADS
Step 1: Once you install our WP QUADS and WP QUADS PRO plugin then go to WordPress Dashboard navigate to Dashboard ->WP QUADS.
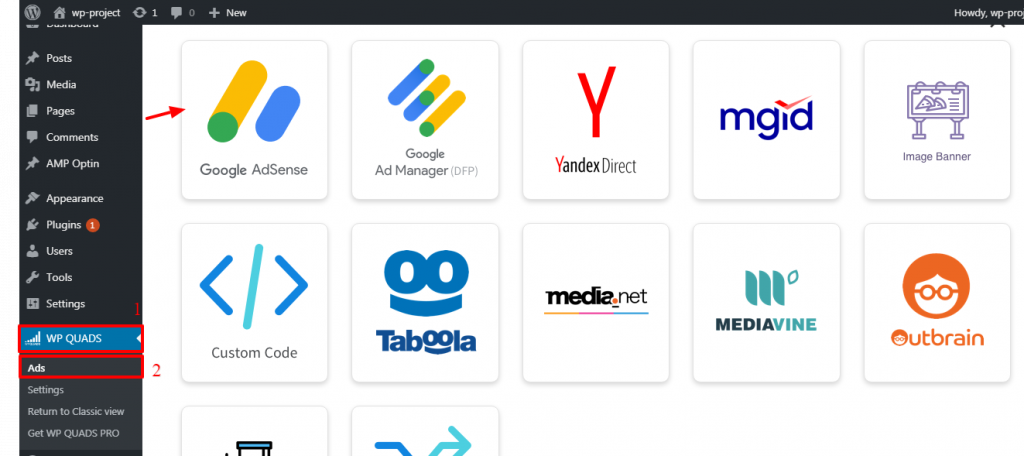
Step 2: Click on Create Ad to add an ad just like in the screenshot below.

Step 3: Select the Ad Integrations as per your requirement For eg: I’ve selected the Google Adsense which you can see in the below screenshot.

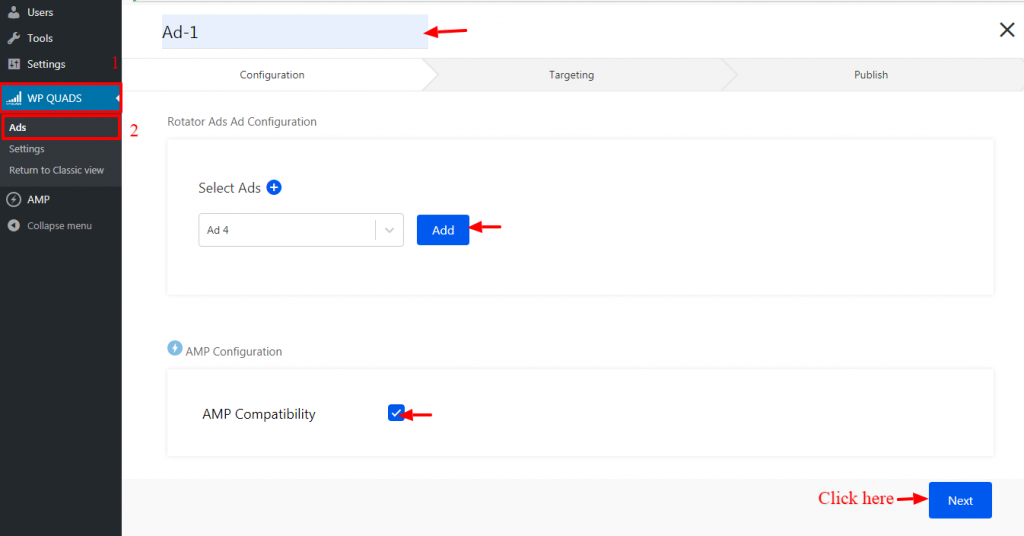
Step 4: Enter your Ad name and fill the below information and then click on the “Next” button

Step 5: You are now in the targeting section. In this Where will the AD Appear option Select Header Position option to display Ad position.

Step 6: Once you are finished with all the selection and theentire all is left to publish the ad by hitting the publish button then your ad is live on your site.
You’ll see all your ads in Ads’ section.
That’s it for this tutorial!
We hope it helped you. If you have any feedback or questions or do you want us to create compatibility for any other Ad company which isn’t listed in our plugin then you can request us we will surely implement it as soon as possible.
Just contact us here and we are always available for you.


