What is Click Fraud Protection?
When you sell ads directly or just want to test the performance of new ads, you might want to display them only for a specific time but also for a particular amount of impressions or clicks. Helps you fight click fraud and helps you stabilize the ad revenue.
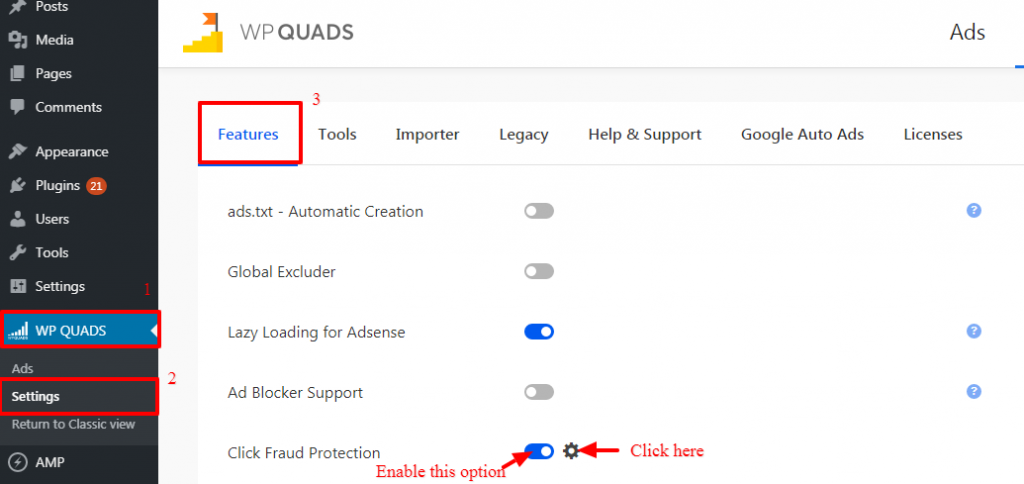
Step 1 – You will find this option in WordPress Dashboard -> Navigate to WP QUADS Option Panel -> Setting -> Features -> Enable “Click Fraud Protection” option. After that click on the gear icon, you can access the Settings page.
Step 2 – After that, you can see these three options Allowed clicks, Click limit (in hours), Ban duration (in days), and Log IP of Blocked Users like below the screenshot.
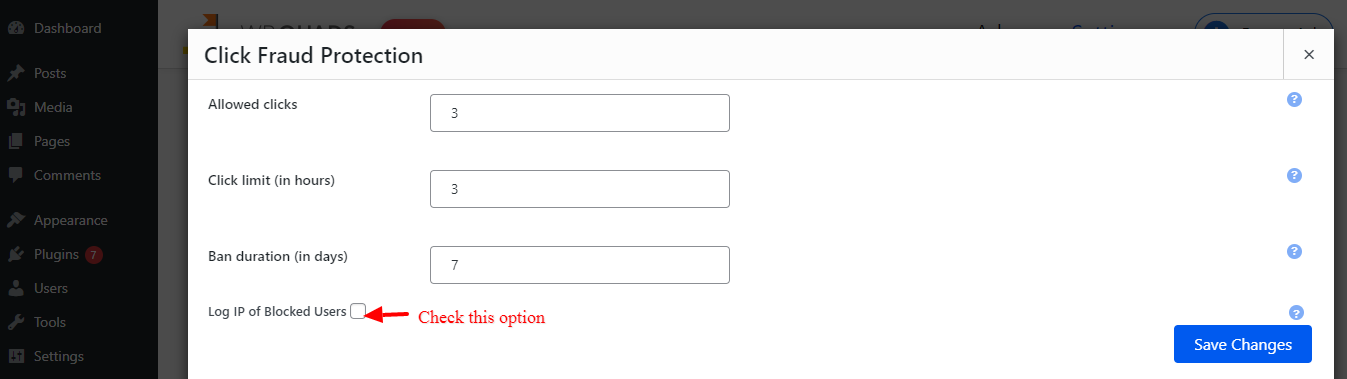
- Allowed clicks: By using this option you can set Allowed Clicks.
- Click limit (in hours): By using this option you can set the Click limit.
- Ban duration (in days): By using this option you can set Ban duration.
- Log IP of Blocked Users: By using this option you’ll be able to view the Logged IP of blocked User.
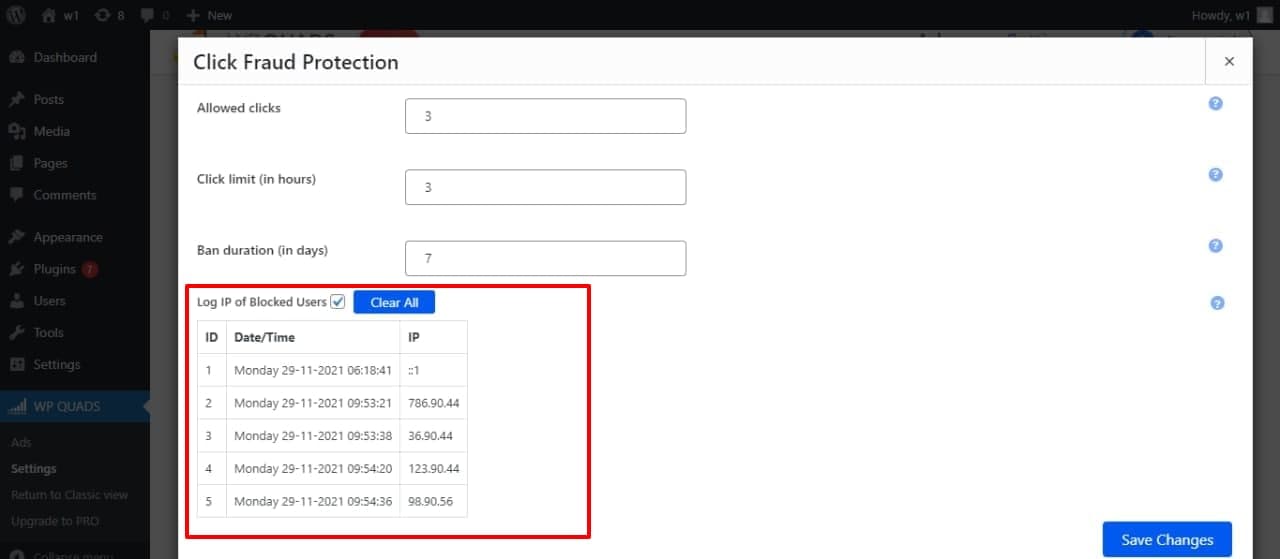
- Once enabled this Log IP of Blocked Users option you can see Data like as shown in the below screenshot.
- Step 3: After that Click on the “Save Changes” button.
That’s it for this tutorial!
We hope it helped you. If you have any feedback or questions or do you want us to create compatibility for any other Ad company which isn’t listed in our plugin then you can request us we will surely implement it as soon as possible.
Just contact us here and we are always available for you.